Guide · April 17, 2026
How to test your water for microplastics at home
Testing water for microplastics used to mean one of three things: mailing a sample to a $600 lab, buying a $2,000 microscope, or writing a grant proposal. A fourth option exists now. $75, two tests, on your own table, in about 15 minutes. Here's exactly how it works.
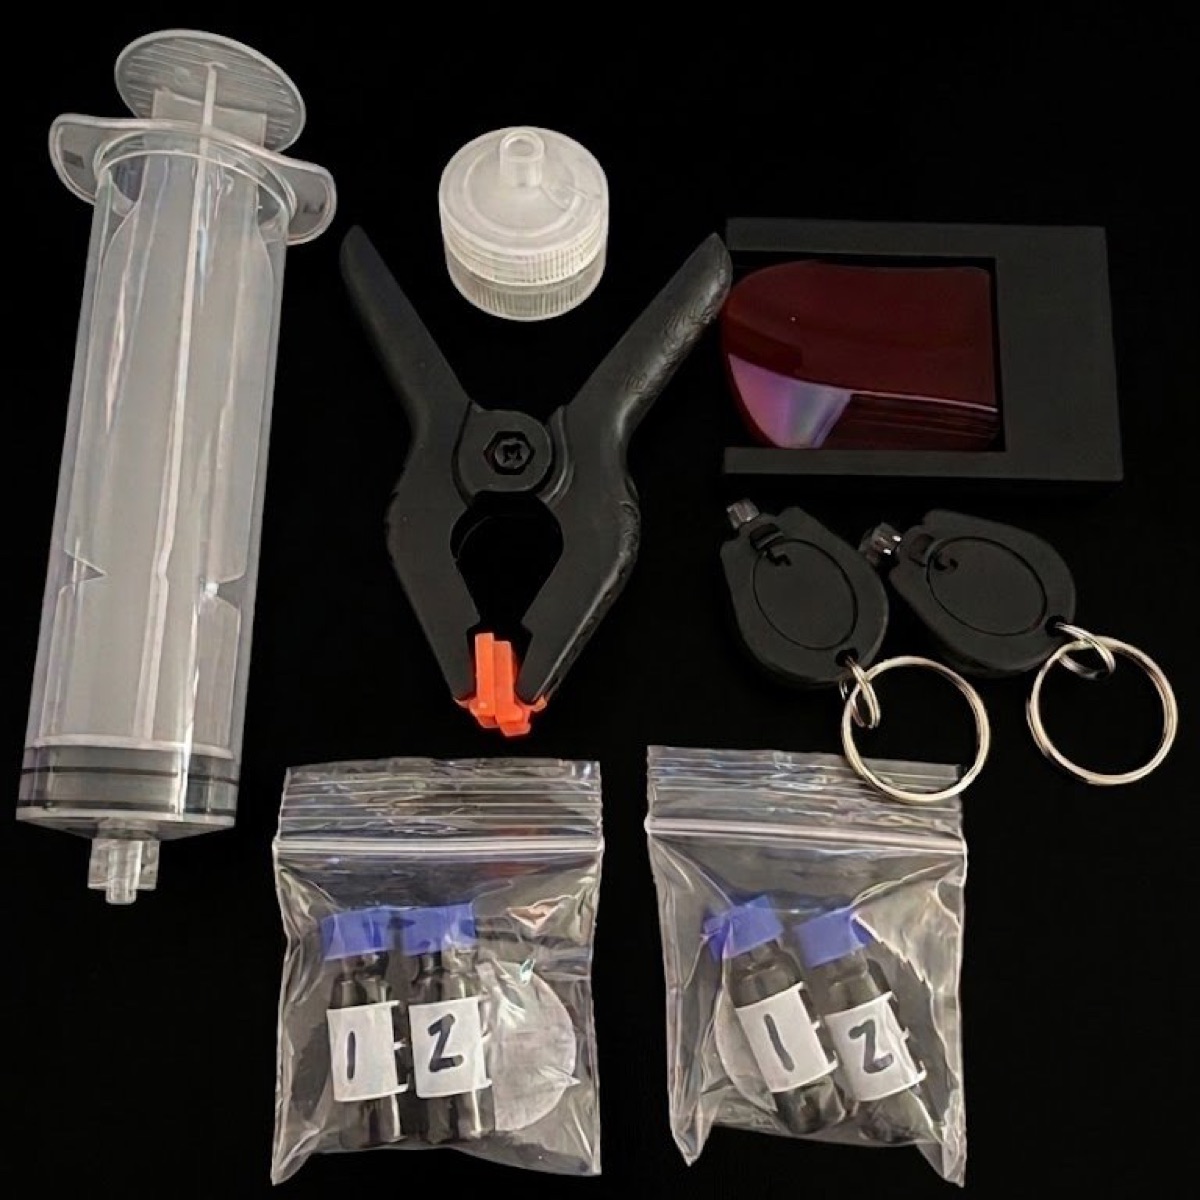
What's in a kit: reagent vials, 25mm filter disc, syringe, phone stand, digital microscope.
The three ways to test water for microplastics
| Method | Cost | Turnaround |
|---|---|---|
| Mail-in lab test | $598–$835 | 2–4 weeks |
| DIY with microscope + lab supplies | $2,000+ in equipment | Hours to build, specialized chemistry knowledge |
| In-home Nile Red kit | $75 kit + $7 per test | ~15 min, start to finish |
This guide covers the third option — the one that actually works for a normal person. The chemistry is the same chemistry a university lab would use. We just moved it to your table.
What you need to test water for microplastics at home
- A 100 mL water sample. Tap, bottled, filtered, tea, coffee — anything you can pour.
- Nile Red fluorescent dye. Binds to plastic polymers and nothing else.
- A 25mm syringe filter (1.0 µm). Traps stained plastic particles on the disc face.
- The included digital microscope. Magnifies the filter disc so the stained microplastics show up as bright pink particles.
- A phone stand. Holds your phone steady while you look at the filter under the microscope.
All of the above comes pre-measured in a single kit from The Water Test ($75, tests sold separately). You can source each ingredient separately if you want — 1 µm syringe filters run $3–$5 each, Nile Red stock is ~$40 for enough to do hundreds of tests, a basic digital microscope is $30–$50. You'll still need to mix the dilutions, which is fiddly (see our methodology page — we iterated for weeks to get the staining right).
The 4 steps, in order
Pour 100 mL of your sample into the viewing cup
Measure matters. Too little sample and you miss particles. Too much and you overload the filter. 100 mL is the calibrated dose.
Add the Nile Red vial. Swirl. Wait at least 15 minutes.
The dye needs time to bind to every plastic particle in the sample. Nile Red is hydrophobic — it sticks to plastic (also hydrophobic) and is repelled by water. Fifteen minutes is the minimum; longer is fine and actually better. Wait time is the most skipped step and the most important one. Don't rush it.
Push the entire sample through the syringe filter
Fill the syringe, screw on the filter, and push the whole 100 mL through in one go. Any plastic in the sample is now trapped on the filter face.
Place the filter under the digital microscope and read the result
Plastic particles fluoresce bright pink; everything else stays dark. Look at the filter under the included digital microscope — the stained microplastics show up as bright pink particles, and you interpret the result yourself, live, in minutes.
What a positive result looks like
Two real customer filters side by side:
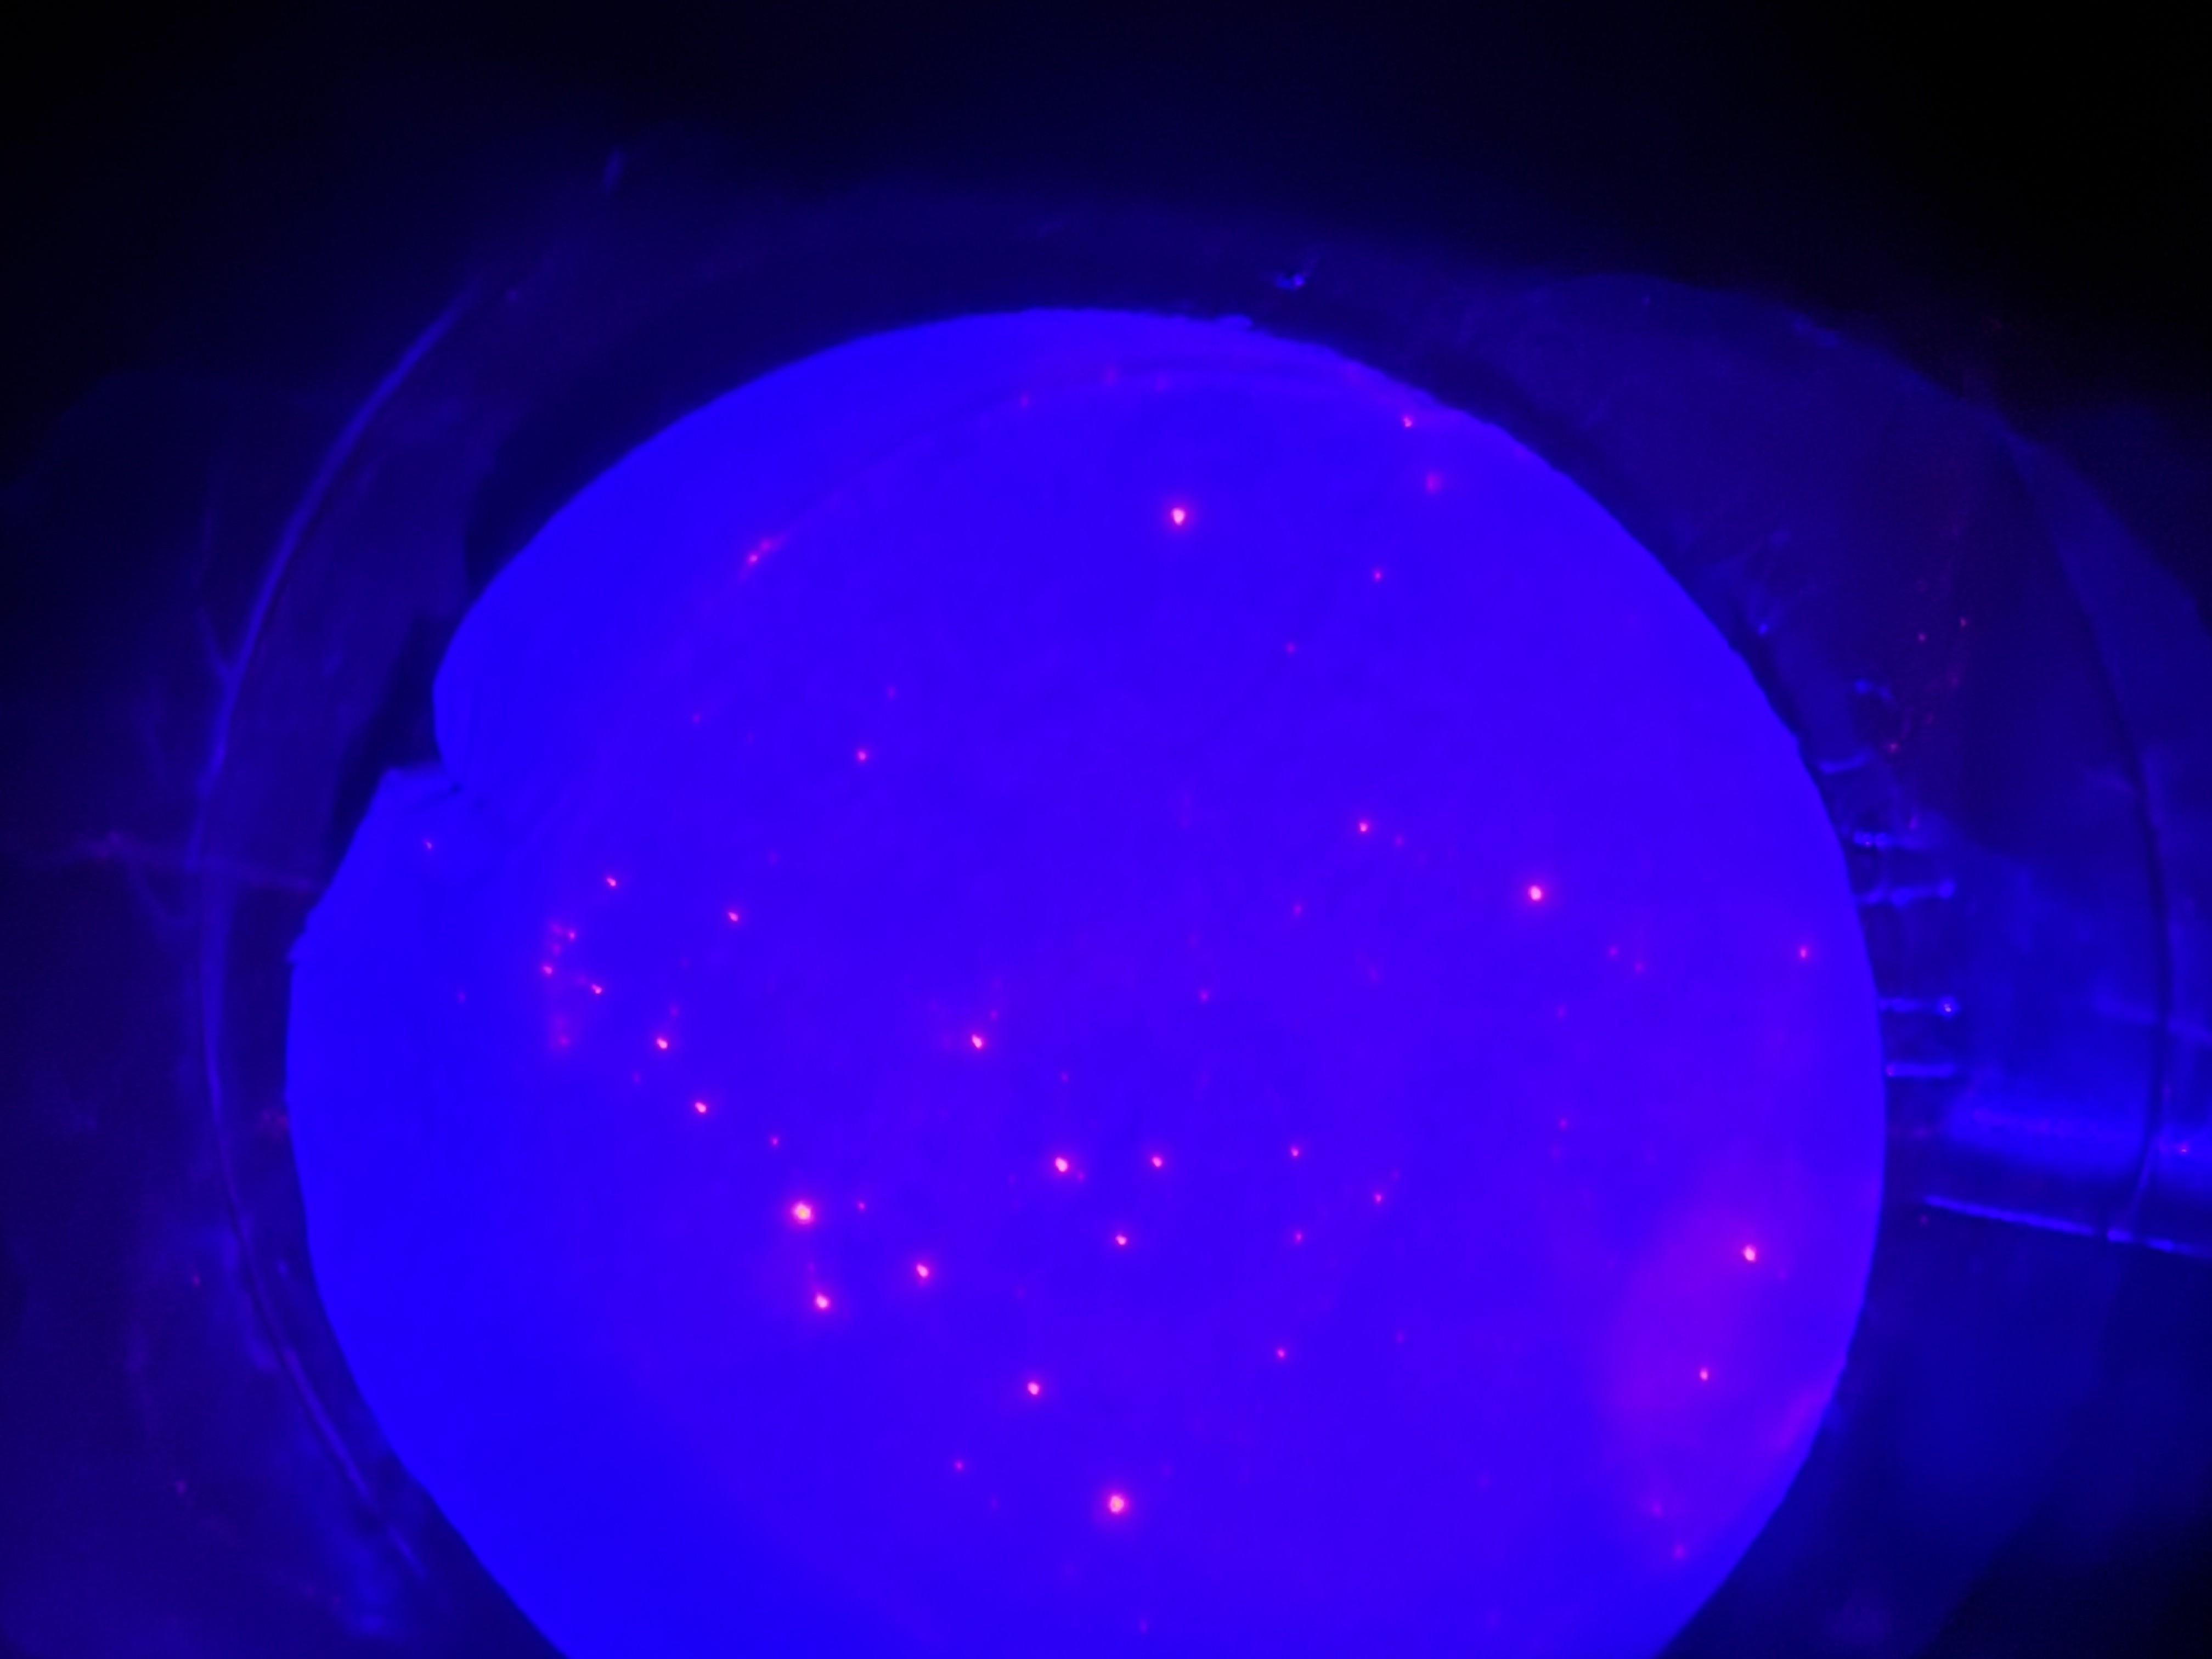
Positive: one-year-old plastic water bottle.
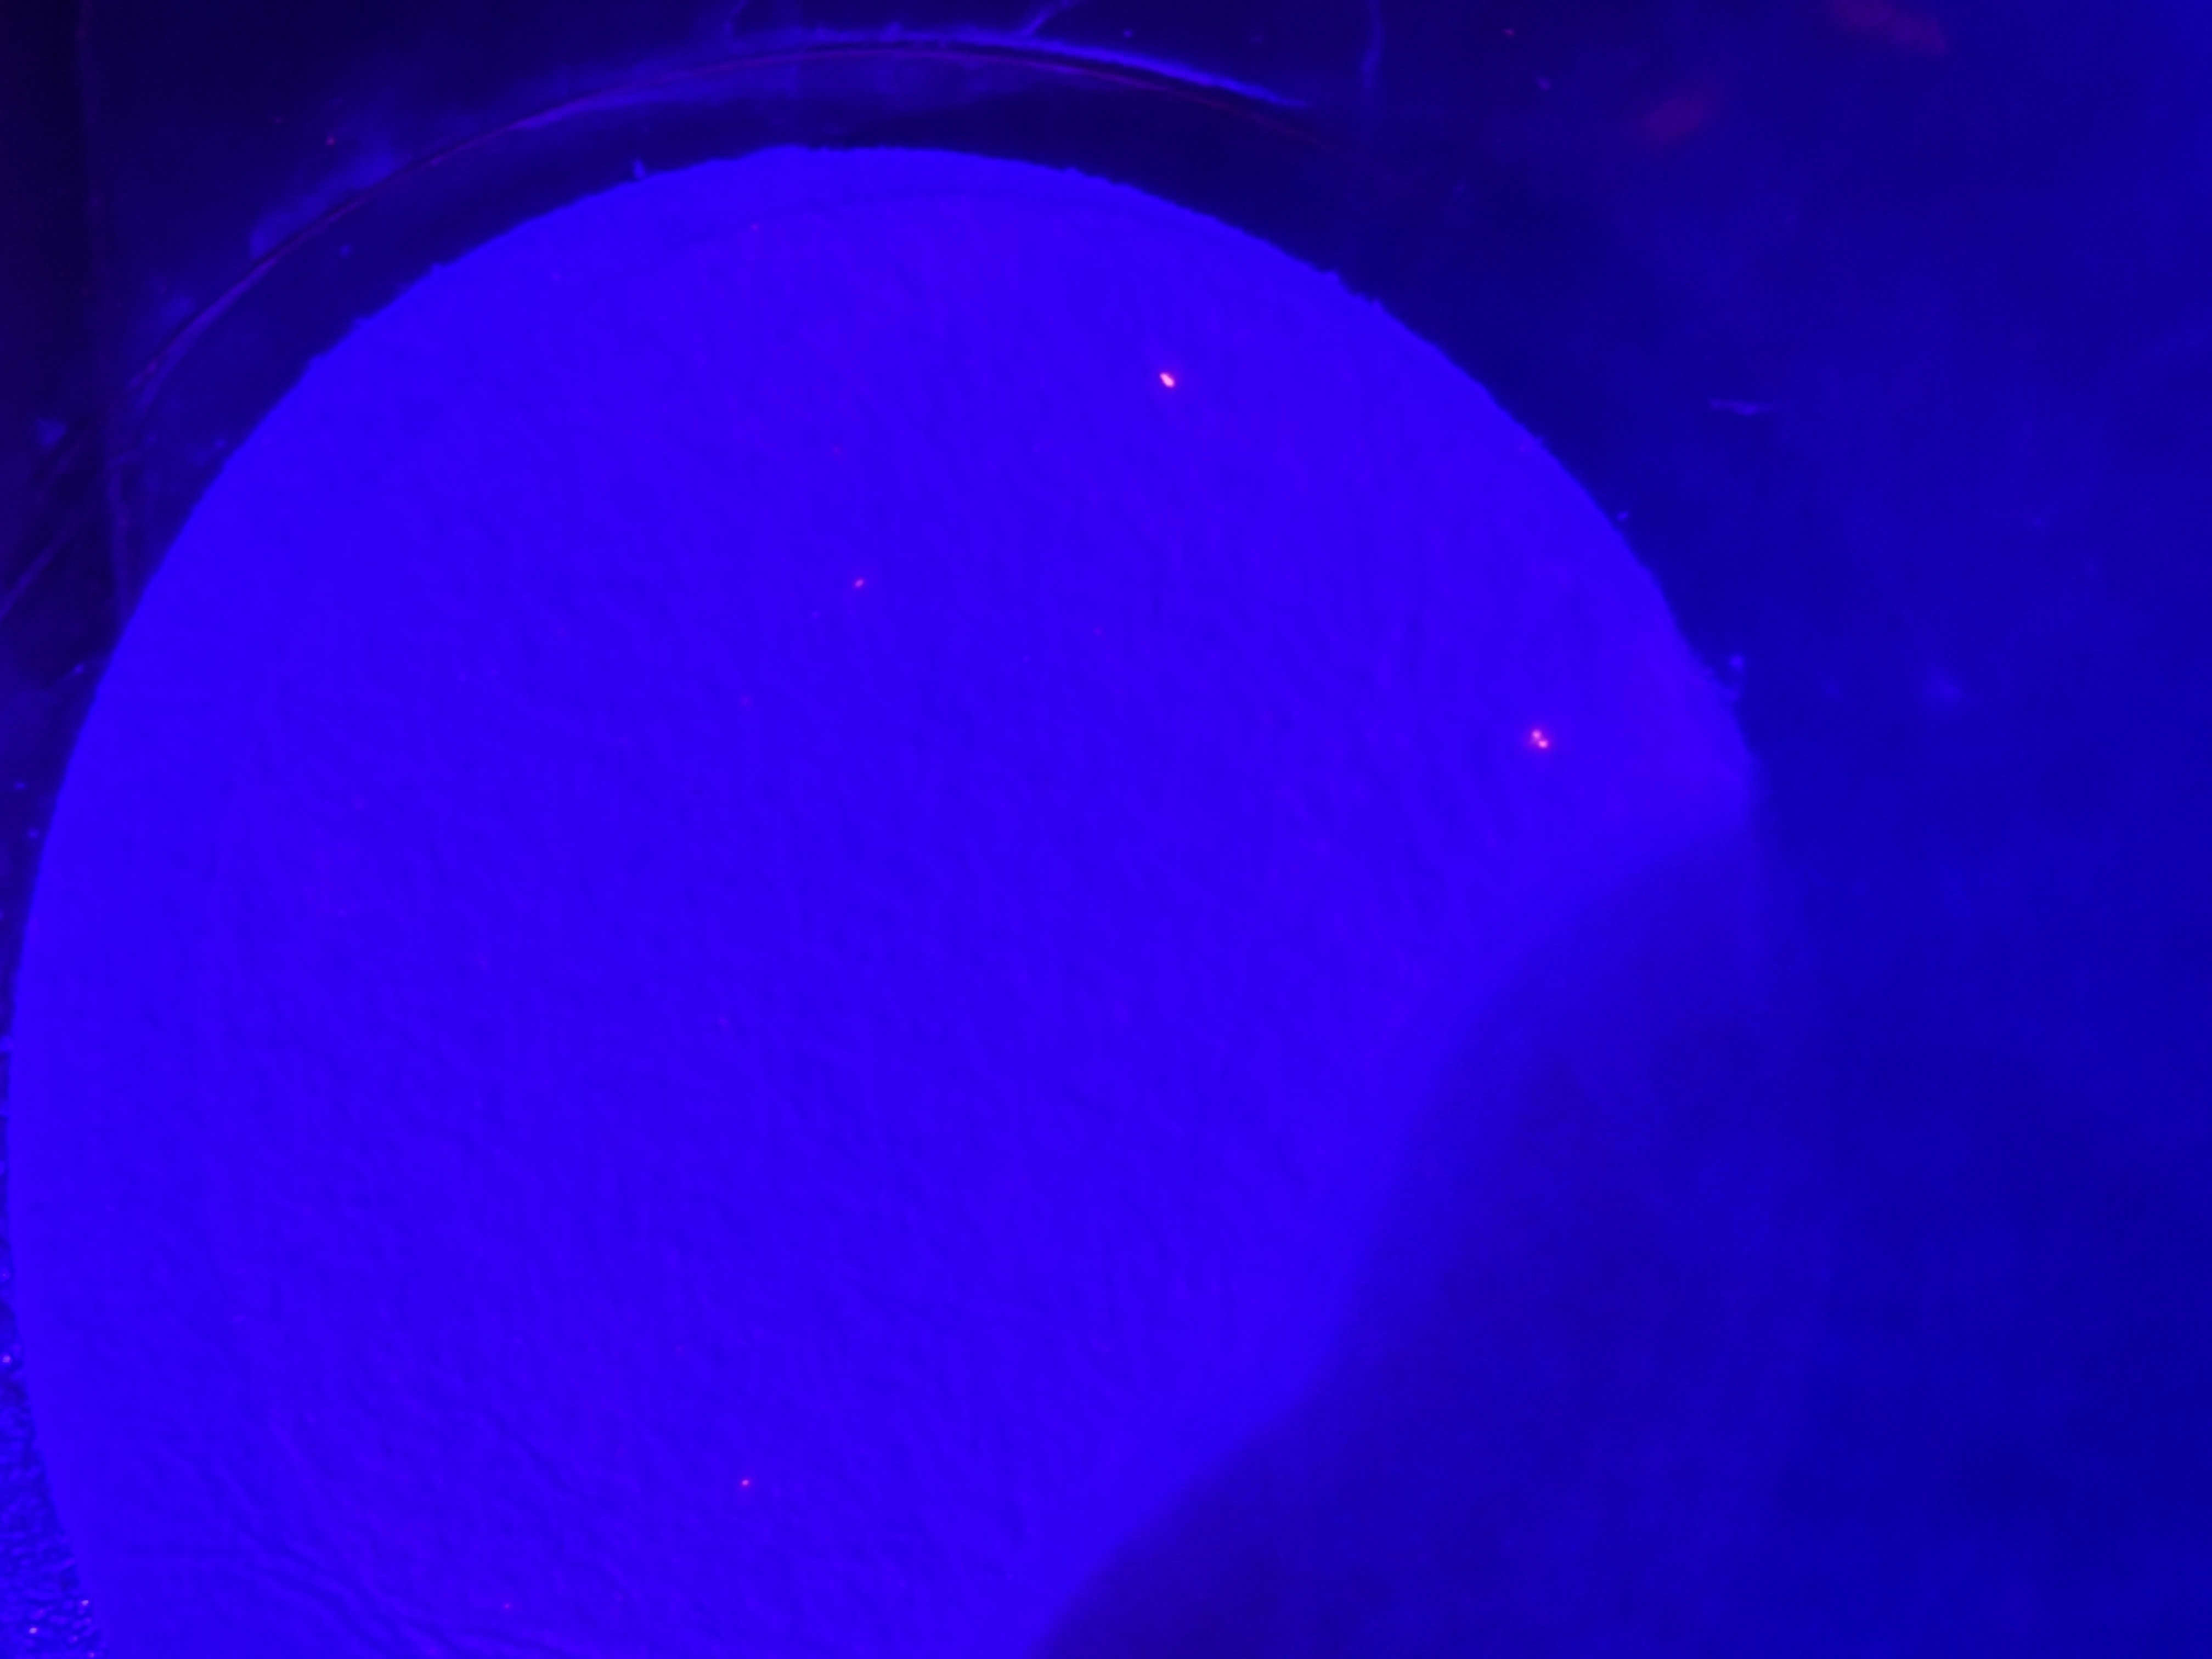
Reference baseline. Almost nothing to count.
Common mistakes
- Treating tea or cloudy water as a clean count. Tannins and other organics bind dye non-specifically. There's no digestion step in this kit, so on organic-rich samples treat the count as an upper bound.
- Skipping a distilled-water blank. Run clean distilled water through the same steps first to see your baseline, then subtract it from your sample count for a cleaner number.
- Not waiting the full 15 min for staining. Plastic-dye binding takes real time. Rush it and small particles go uncounted.
- Reading the filter in a bright room. Ambient light washes out the pink fluorescence. Look at the filter under the digital microscope with the room lights down and the pink particles stand out.
- Using unfiltered tap water as a 'blank.' Your reference sample has to actually be clean. The kit includes a reference card with what our calibrated baseline looks like.
What this test does and does not tell you
It does: count plastic particles larger than roughly 1 µm in a 100 mL sample. Give you a before/after for a filter. Compare two water sources side by side. Confirm or deny the presence of microplastics in any liquid you can pour.
It doesn't: identify which polymer (PE, PET, PP) — that takes py-GC/MS, a five-figure instrument. Detect nanoplastics below the filter pore size. Test for metals, PFAS, or bacteria.
It answers one question: how much plastic is in this sample. For most people, that is the question.
Related